
SIX-THREE SPECIAL

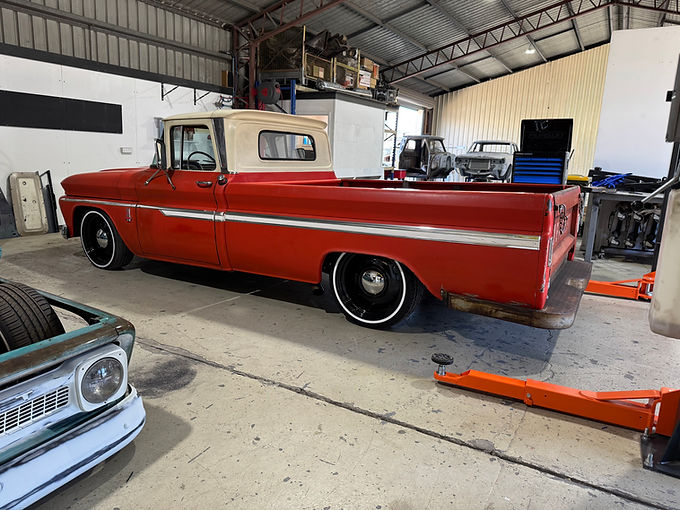
Billy's been part of the TCF family for years. So when he handed over his 1963 C10, he didn't just ask for a build - he entrusted us to bring his vision to life. Billy’s ’63 rolled in running a tired old Vortec 350, a TH700, a loud and very unhappy 12-bolt, and sagging on nothing more than lowered springs. He’d been lining up a spot with us for months, and the second the new workshop doors opened he was straight in — no hesitation.
We’re not just refreshing the worn-out driveline… Billy’s end game was always airbags. So he pulled the trigger on our Stage 1 Air Ride Kit — packed with a heap of TCF hardware to get this thing closer to the floor. We’re talking:
-
TCF C-notches
-
TCF Rear, Centre & Transmission x-members
-
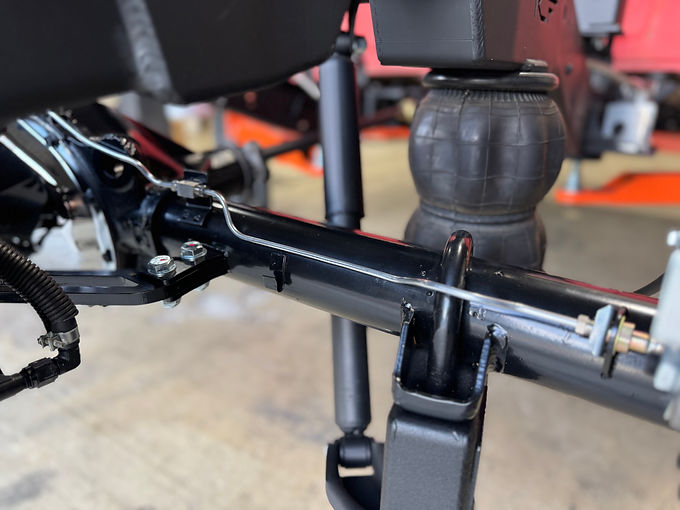
TCF lowered tubular trailing arms
-
TCF Watts link
-
TCF 90mm Raised Bed Kit w/new bed braces
-
Tubular front airbag control arms & top plates
-
Slam Specialties airbags all round
-
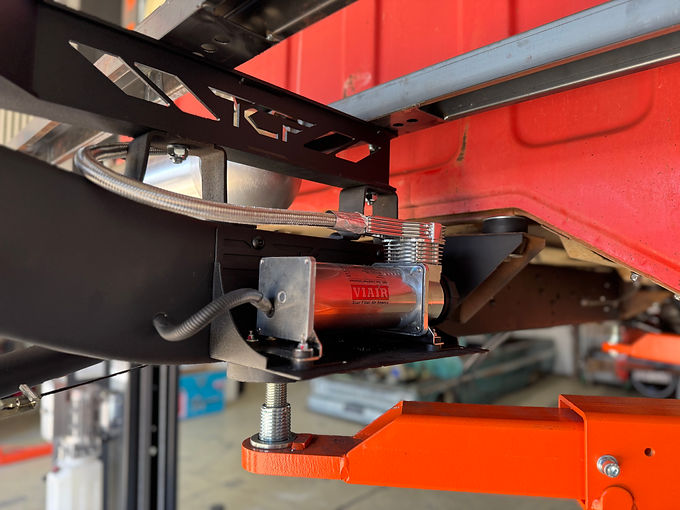
Twin Viair compressors on TCF compressor mounts feeding a seamless 4 gallon air tank.
-
All tied together with an Air Lift air-management system
From a saggy cruiser to a fully engineered, bagged ’63 C10 with proper attitude — this thing is about to level up in a big way.


Along with the full air ride setup, we’re ditching the tired 350 and dropping in a fresh 430hp Blueprint 383 Stroker — exactly what this truck deserves. We’re also giving the 12-bolt a complete overhaul with new gears and a new centre, plus a fresh converter to tie the whole combo together. And that’s only scratching the surface of what’s planned for this build.

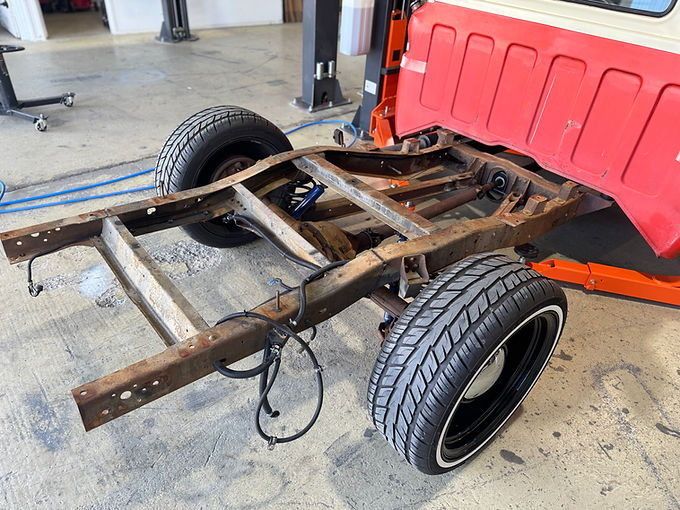
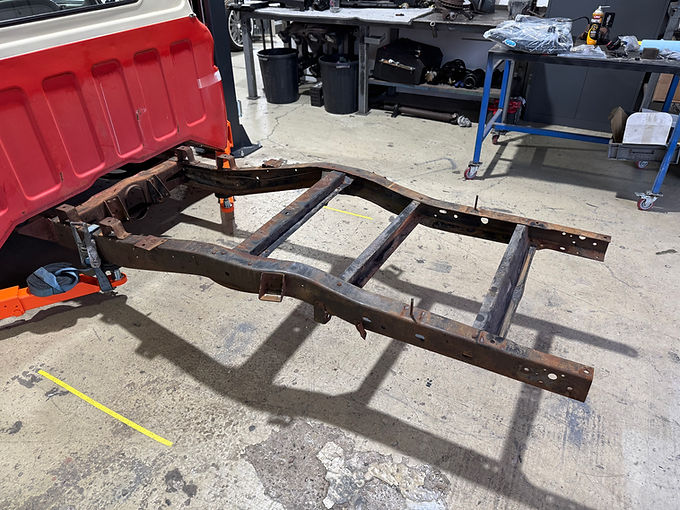
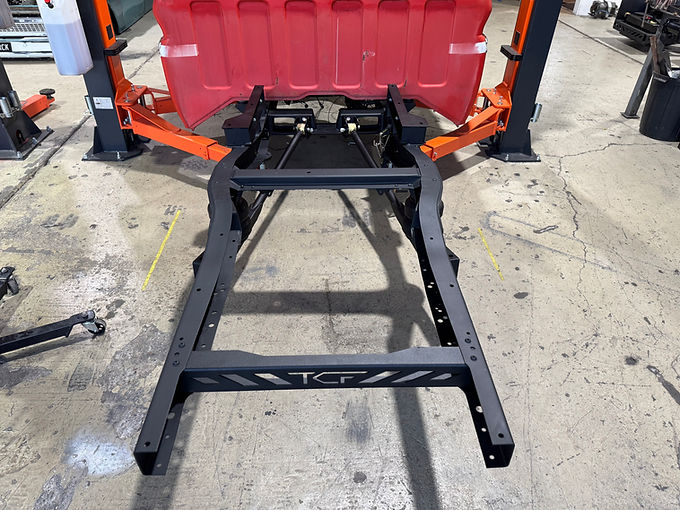
First thing off was the truck bed — dropped onto a dolly and pushed aside so we could get straight into the chassis. We stripped it down, cut out all the factory crossmembers, and started loading it up with TCF goodies. The 12-bolt was pulled, torn down, and sent off for powdercoat. With the diff out, we jigged up the chassis and got it ready for the c-notch.

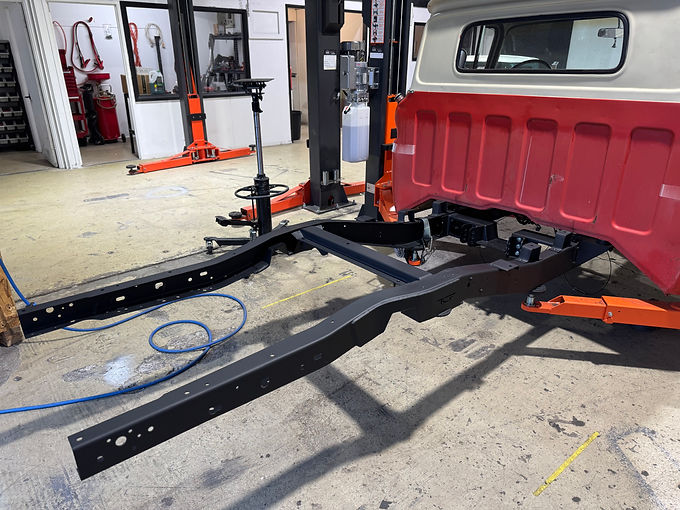
With the C-notch fully welded and dressed, we turned our attention to surface prep on the chassis. The rails were stripped back with a combination of mechanical abrasion and chemical removal to take off rust scale, factory coating, and any residual contaminants. Once cleaned and keyed, we applied a black epoxy enamel to provide a durable, corrosion-resistant base layer.

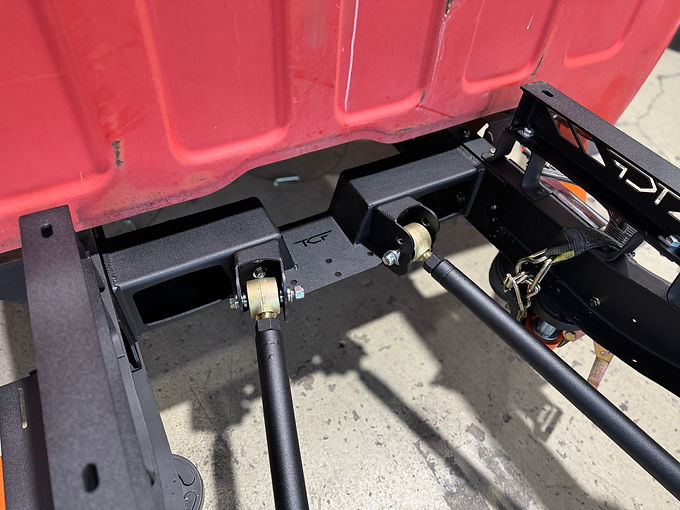


With the coating cured, we began reassembly. The Centre X-member and rear X-member were located using factory datum points and bolted in with new high-tensile hardware. The 90 mm bed-raise brackets were indexed off the original mounting holes to maintain bed alignment. Compressor brackets were mounted on the chassis rails, which will be located under the bed. Finally, the lowered tubular rear trailing arms—pre-fabricated and powder-coated prior to Billy’s build slot—were installed, ensuring correct pinion angle and arm geometry for the upcoming air-ride setup.


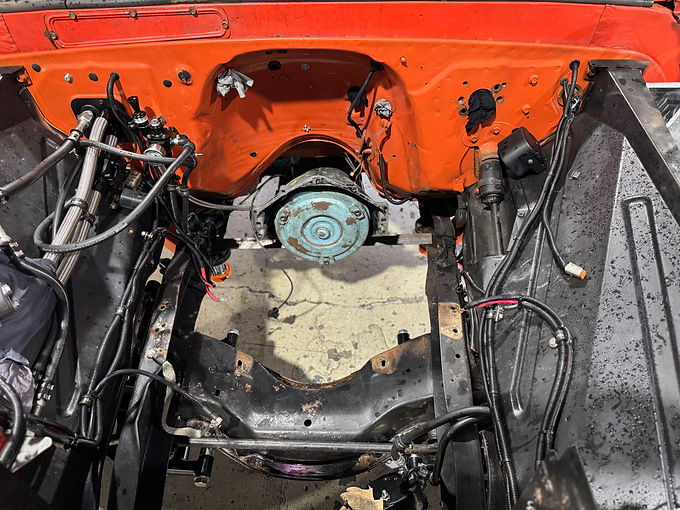
While the rear end fabrication was underway, progress up front didn’t slow down. The Vortec 350 was pulled from the chassis, and the engine bay was thoroughly degreased and stripped of years of grime and residue. Billy requested a fresh, uniform finish, so we prepped the firewall and coated it in 2K satin black to tie in with the inner fenders and radiator support.
With the front end prepped, we turned back to the driveline. The 12-bolt returned from powdercoat, and we began reassembly using a fresh Richmond 3.73:1 gearset paired with an Eaton Tru-Trac. All new seals and bearings were installed throughout to ensure a tight, reliable setup ready for the torque of the new powerplant
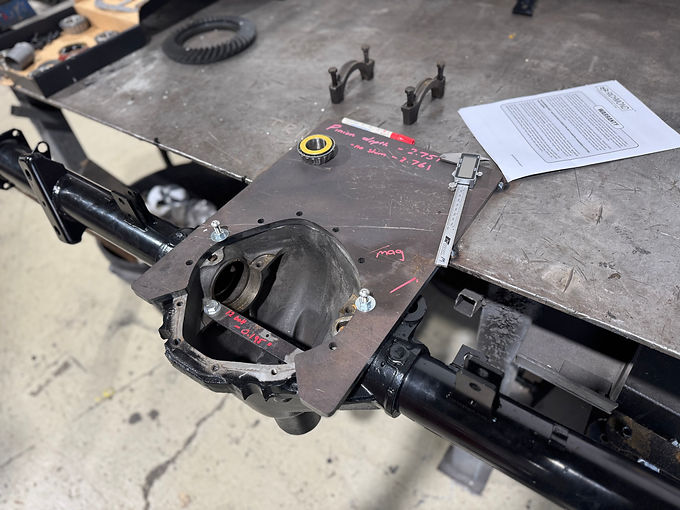


We rebuild a lot of 12-bolts, and dialing them in properly takes time. Achieving the correct pinion depth, backlash, and bearing pre-load is a precise process. We start with sacrificial bearings during initial setup so we can make repeated adjustments without damaging the new components. Once we’re satisfied with the contact pattern, the new bearings are pressed on for final assembly. The centre is then fully buttoned up and the wear pattern is checked again to confirm everything is consistent and within spec.


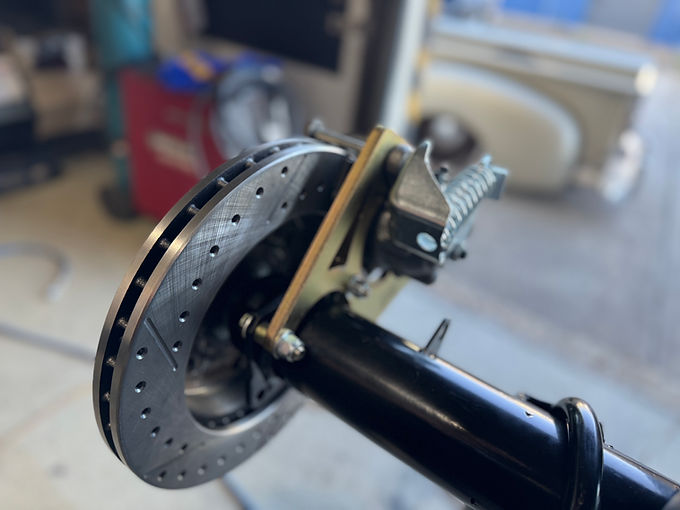

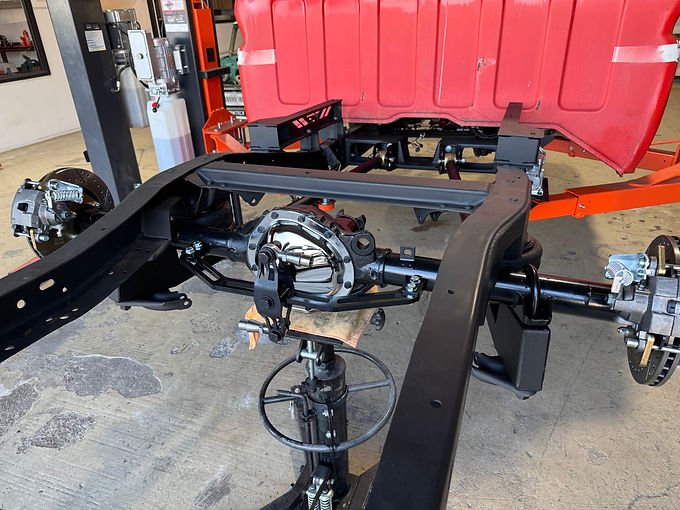
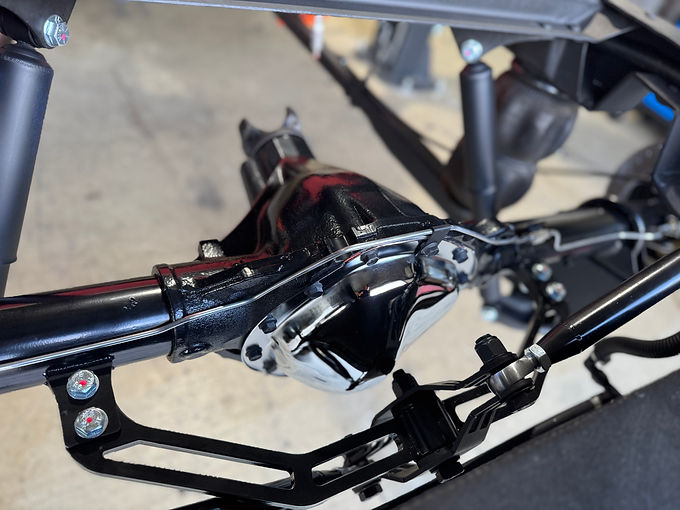
The diff went back into the frame, now topped off with a fresh chrome diff hat. We also installed the watts link and the CPP rear disc brake kit. Everything had been fully mocked up before the housing went out for powdercoat, which allowed us to weld on the brake line tabs for the flexi lines ahead of time. New brake lines over the diff were fabricated in-house, and we ended up replacing the lines throughout the entire truck—the original 60-year-old lines had definitely seen better days.
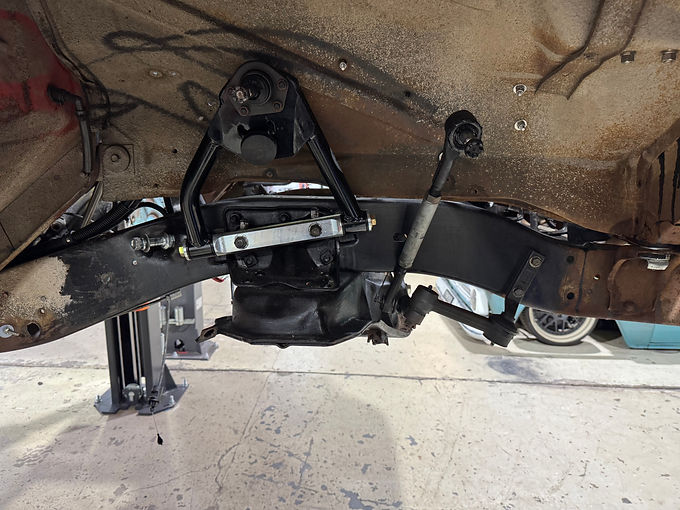
The front end was upgraded with airbag-specific tubular upper and lower control arms, paired with a reinforced top plate to correctly locate the bags within the factory crossmember. Height sensors for the Airlift management system were mounted with adjustable linkages to ensure accurate suspension travel feedback.
At the back, the seamless 4-gallon tank was test-fitted and positioned using the 90 mm bed-raise kit to maintain adequate clearance for plumbing and serviceability. Dual compressors were mounted on the brackets, and all pneumatic lines were routed through bulkhead fittings with secured P-clamps along the chassis. The full wiring harness for the air system was terminated, loomed and heat-shielded where required.
The Airlift manifold was mounted to the chassis rail on a fabricated plate, keeping all valves accessible while maintaining protection from road debris and exhaust heat.


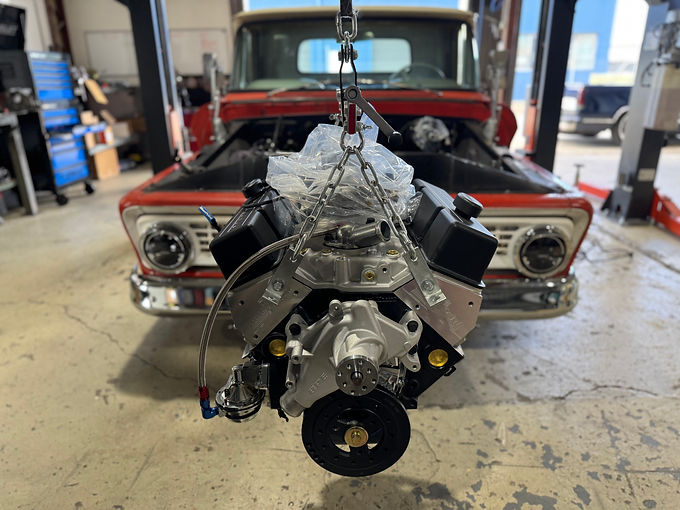
Then came the fun part — shoving in the brand-new Blueprint 383 Stroker, a crate motor that doesn’t just make power, it picks fights. We’ve used plenty of Blueprint engines, but this one is flat-out hostile. North of 430hp, 4-bolt main roller block, alloy heads, 750 Holley, full roller top end — every single internal component brand new and built to smash gears, tyres, and egos.
The factory HEI got tossed in the bin and replaced with an MSD Pro Billet dizzy for hard, clean spark at any rpm. Billy brought in his own rocker covers and air cleaner to give it that personal touch, and we bolted his existing front drive system straight onto the fresh stroker. To make sure the combo hits like a sledgehammer off the line, we matched it with a 2400rpm B&M Holeshot converter — the right stall to let that cam wind up and punch hard the second Billy stands on the loud pedal.

Along with the raised bed kit, Billy asked us to nuke the crusty old timber and strips in his bed — no arguments here. He came to the right mob anyway, because we’re the ones who actually source, machine and sell the Aussie hardwood kits for these trucks.
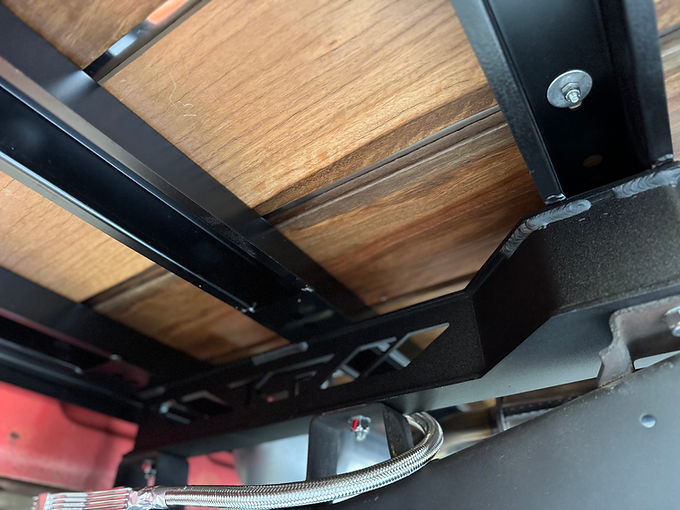
Billy picked Spotted Gum with a tough-as-nails 2K matte clear, and we don’t touch anything but A-grade Australian hardwood. We size every board to the exact factory widths, route every groove in-house, and finish them in gloss, satin or matte. Stains? Done. Shipping? Anywhere in Australia.
When we run the 90mm raised bed kit, we also weld in a raised rear filler panel that mimics the factory one — right down to the holes for the bed strip bolts. This rear section carries our TCF logo, and it’ll be painted black before the timber goes in.
His 60-year-old bed braces also got shown the door. We swapped them for our own upgraded, fabricated-in-house units — wider, stronger, and built so you’re not shredding your fingers trying to get nuts on the 130 bed bolts these things run.


Billy ditched that stinky in-cab fuel tank months ago — actually the first thing he ever bought off us. With the new bed setup, we re-mounted his flush-mount filler cap cleanly into the timber so it sits exactly where it should.
With the bed bent back down onto the chassis, we sorted the water traps, plumbed properly and mounted where you can actually reach them. A new transmission cooler went in on a custom under-bed mount — not some dodgy zip-tie job, an actual fabricated bracket that won’t move an inch.
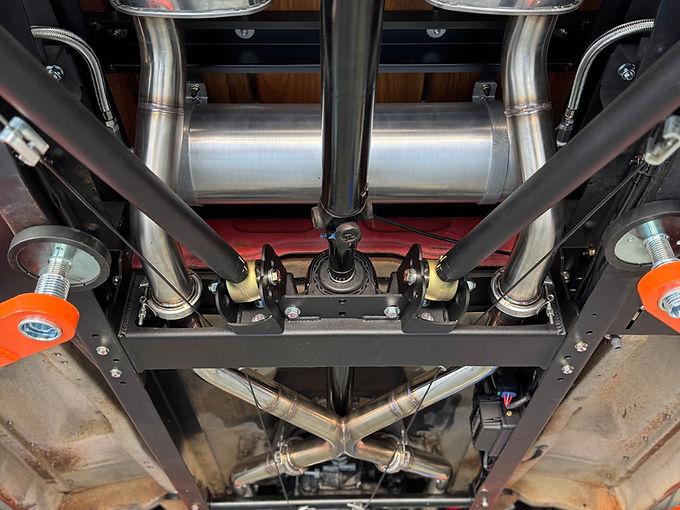
To finish it off, Anthony built a fresh stainless exhaust, running into stainless Lukey mufflers and dumped right at the diff. Stainless on stainless, clean welds, no nonsense — just the right amount of anger coming out the back.


As we do with all our bigger builds, we like to put proper miles on them — get them hot, settle any teething issues, and tweak whatever needs tweaking. So over multiple weeks we took this thing around town, out on the highway, and gave it a real-world shake-down.
It ran mint. Looks killer, sounds angry, and drives unreal. And for anyone still carrying on that airbagged vehicles “drive bad”… maybe try a truck that’s actually built right. This thing just does everything it’s supposed to — smooth, tight, planted.
It’s a super clean rig, turned out exactly how it should, and Billy absolutely loves driving it. Hard to blame him.


Thank you, Billy, for giving us the privilege of bringing your dream to life. Projects like this remind us why we love what we do — turning someone’s vision into something real, memorable and meaningful. This truck isn’t just another build — it’s a new benchmark. The kind of rig that will have people walking through our doors saying, “Give me the six-three special.”
Updated as of July 2025.